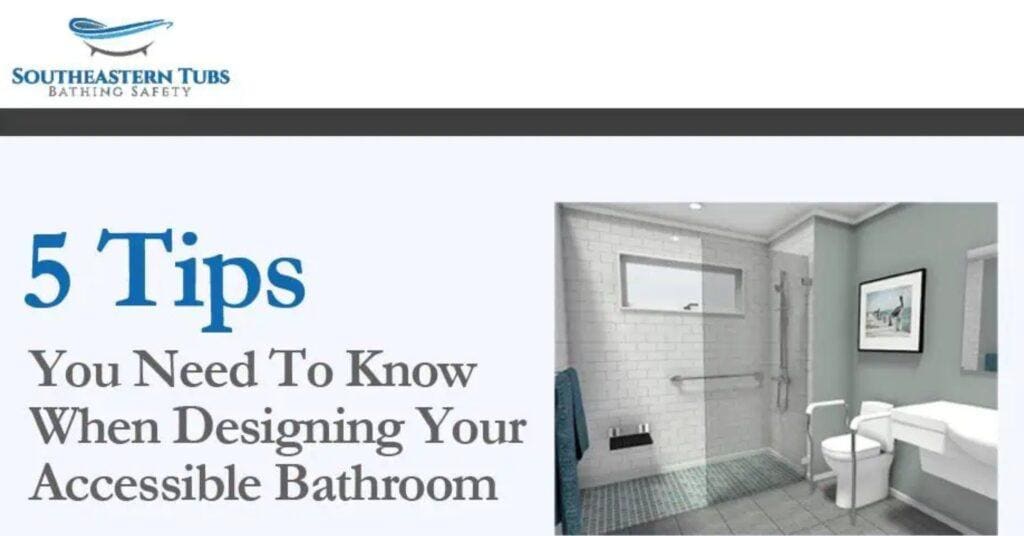
When designing an accessible bathroom, you need to consider various points to make it usable. Fortunately, it’s straightforward to design an accessible bathroom, as long as you keep a few points in mind.
Limited Time:
Buy Now Pay Later
No payment due for the first 18 months after installation!
As low as $100 a month
Here are five tips to keep in mind when designing your accessible bathroom:
- Install a large, walk-in shower.
- Leave enough space around the toilet and sink.
- Install grab rails at key points.
- Use non-slip tiles.
- Install accessories at the correct height.
This article will explore the above tips in more detail.
1. Install a Large, Walk-In Shower
Showering or bathing is one of the most challenging aspects when using a bathroom as a person with disabilities. Bathtubs can be difficult or impossible to get into, while shower cubicles with steps and narrow entrances make showering challenging.
Your shower area should be flat and wide enough to accommodate a wheelchair or a shower chair. Most wheelchairs are between 25 and 27 inches (63.5 and 68.58 cm) wide, so your shower entrance should be a few inches wider than this.
If you don’t like the idea of using a shower chair, consider installing a permanent, tiled bench in the shower area. The bench could double as a storage area for toiletries.
If the shower has a sound drainage system and is large enough, you can leave one of the sides permanently open to facilitate the wheelchair’s movement.
An advantage to having a large and open-ended shower area is that it accommodates a helper and any other showering tools the person might need.
2. Leave Enough Space Around the Toilet and Sink
If you’ll be using a wheelchair in your bathroom, having enough space to maneuver around the toilet and sink is essential.
According to the Americans With Disabilities Act (ADA), wheelchair users need an area with a diameter of at least 60 inches (152.4cm) to turn. When determining your toilet and sink placement, you should bear this in mind.
Having plenty of space around the toilet or sink easily lets a caregiver assist. It also allows a handicapped person to help themselves more easily, creating a feeling of empowerment.
Speaking of the toilet and sink, instead of installing a standard-sized toilet, consider a taller one for easier transfers. You might also need to adjust the sink’s height so that it’s accessible for a person who uses a wheelchair.
Instead of an under-sink cabinet, consider drawers with easily-accessible handles. Ravinte 5-Inch Cabinet Pulls from Amazon.com come in a 30-pack and are large enough to grab easily.
3. Install Grab Rails at Key Points
Every accessible bathroom should have plenty of grab rails at the correct height. A person who uses a wheelchair, for instance, will need lower grab rails than someone who doesn’t use a wheelchair.
Here are the key points in an accessible bathroom for grab rails:
- In the shower. Showering poses the most significant risk for a handicapped person, as soap creates slippery surfaces, and the wet tiles could make them fall. You should have at least three grab rails in the shower: at the entrance and along each vertical surface.
- Next to the toilet. A grab rail allows the person to get on and off the toilet safely.
- Near the sink. A grab rail close to the sink gives peace of mind if you suddenly feel unsteady while brushing your teeth or washing your hands.
Although not essential, a grab rail at the bathroom’s entrance can be an extra safety feature as the person enters or exits the bathroom. If the bathroom is very large, you should consider installing grab rails at regular intervals along the wall.
4. Use Non-Slip Tiles
When designing an accessible bathroom, smooth and shiny tiles are a big no-no as they are a fall risk.
While all tiles carry a fall risk, textured tiles aren’t as slippery and can decrease the risk. Below are some helpful pointers for picking out non-slippery tiles:
- Look for matte tiles. Shiny tiles often have an invisible coating that makes them slippery. Matte tiles, on the other hand, have more friction, making them less slippery.
- Examine the tile’s texture. When you’re shopping for tiles, run your fingers along the tile’s surface. If it feels rough and textured, it probably offers better non-slip properties than ones that feel smooth.
- Consider stone tiles. Stone tiles are excellent choices for accessible bathrooms. They give bathrooms a rustic look and are not as slippery as porcelain or ceramic tiles.
You might consider installing non-slip stickers over the shower cubicle tiles for additional safety. Secopad Anti Slip Shower Stickers from Amazon.com come in a 24-pack and provide an excellent grip for shower tiles.
5. Install Accessories at the Correct Height
Most bathrooms are not designed with handicapped people in mind and have shelving and other amenities that the person might not be able to reach. When installing your bathroom accessories, consider the ideal height for the following:
- Towel rails
- Toilet paper dispenser
- Mirrors
- Shelves
- Medicine cabinets
Conclusion
Overall, when designing an accessible bathroom there are a few key points to keep in mind. Firstly, install a large walk-in shower to make showering easier. Secondly, leave enough space around the toilet and sink for a wheelchair user to maneuver. Thirdly, install grab rails at key points around the bathroom. Fourthly, use Non-Slip Tiles, and finally, measure and install all of your accessories at the Correct Height.
We hope our article gave you the insight you were looking for and can now make the right decisions when designing your bathroom. If you have questions or are looking for a walk-In Tub or walk-In shower call us today.
Limited Time:
Buy Now Pay Later
No payment due for the first 18 months after installation!

